Friday 28 February 2014

Mini Lemon & Strawberry Cheesecakes


I went through a stage where I didn't like cheesecake. In school, we often had to make the same thing every week and change different ingredients every time to assess for our coursework. One of those things was cheesecake. I had cheesecake every week for a long time, and eventually got sick of it, and didn't eat it for a few years after that. But now I've learned to love it again - it's quite a summery treat but it reminds me of christmases at home where we always have a cheesecake for dessert. These mini no-bake cheesecakes are great for portion control and they look adorable!
 
Recipe
 
125g digestive biscuits
50g butter
140ml double cream
300g cream cheese
2-3 squeezes of lemon juice
50g icing sugar
 
Firstly, crush the digestive biscuits into crumbs. Melt the butter, either in the microwave or on the hob, and add in the crumbly biscuits.


Line a muffin pan with cupcake cases (I made 9 good sized cheesecakes). Press the biscuit base into the bottom of the cases and flatten out with the back of a teaspoon, so that it's nice and even. Let them set in the fridge for an hour or two.
 
 
When the base is set, whisk together the cream cheese and icing sugar and then whisk in the cream until it is thick and creamy.


Lay it onto the chilled bases and smooth it down.


Let them set for a few hours or overnight and then carefully peel away the cases. And there you have it, cute little cheesecakes! Enjoy!


Liddie xx

Thursday 27 February 2014

Chicken Katsu Curry

 
Before I made my own chicken katsu for the first time, I had never tried it and so I can't compare this curry to ones you get in Japanese restaurants. However, this curry is really yummy! It is quite similar to ones you get in chip shops or Chinese takeaways, but with a hint of sweetness. The first time I made it I deep fried the chicken according to the recipe, however I have now decided just to bake the chicken in the oven. Although it doesn't go as golden and nice looking as when you fry them, it tastes just as good and is so much healthier! So if you're after a takeaway, make this instead. Healthier and cheaper! (although after some research I've found out that katsu IS the deep fried version, so mine isn't technically katsu chicken. But it it still has the katsu curry sauce).
 
Recipe  - Serves 4 (Retrieved from allrecipes.co.uk)
 
2 tablespoons sunflower oil


2 onions, sliced
5 garlic cloves, chopped
2 medium carrots, sliced
2 tablespoons plain flour
4 teaspoons curry powder
600ml chicken stock
2 teaspoons honey
4 teaspoons soy sauce
1 bay leaf
1 teaspoon garam masala
 
For the breaded chicken
  • 4 chicken breast fillets, pounded to 1cm thickness
  • Salt and pepper to taste
  • 2 tablespoons plain flour
  • 1 egg, beaten
  • 100g fine breadcrumbs or panko breadcrumbs
  • 230ml vegetable oil for frying
  •  
    First, prepare the carrots, garlic and onion. Then get everything ready for coating the chicken - you will need the egg, breadcrumbs and flour in seperate bowls.


    The chicken breasts need coating first in flour, then in egg and finally covered in breadcrumbs. Make sure you give them a good coating. I baked mine at 180°C for 30 minutes, so put them in whenever you like - the sauce takes about the same time. Or you can fry them if you prefer, this is just the way I did it.
     
    Heat the oil in a saucepan, and then fry the onion and garlic until soft. Then add carrots and cook for 10 minutes.


    Add the flour and curry powder and cook for about a minute, and then gradually add the chicken stock.


    Once you've added the chicken stock, add the honey, bay leaf, soy sauce and garam masala. Bring it to the boil and then let it simmer for about 10-15 mins. We blended the veg into the curry and it tasted lovely, but you can sieve them out if you prefer. Take out the chicken, slice it and enjoy on rice or homemade wedges!


    Liddie x

    Tuesday 25 February 2014

    Oaty Cookies


    I was on the look out for a good oat cookie when I came across these, Mary Berry's oat cookies. I've tried a few of Mary Berry's recipes before and they always turn out great, so I knew I had to try them. I wasn't disapointed, they are so delicious! They remind me a bit of hobnobs, but a lot nicer as they are homemade. You can make them soft, chewy or crunchy depending on how long you cook them for. Perfect with a cup of tea!


    Recipe
     
    175 g self-raising flour
    75 g porridgeoats
    175 g granulated sugar (But I use caster sugar and they  still turn out great)
    1 tsp bicarbonate of soda
    1 tsp baking powder
    175 g butter
    2 tbsp golden syrup 
     
     
    First, pre-heat the oven to 180°C. Mix together all of the dry ingredients.


    Then, in either a saucepan on a medium heat or in the microwave, heat together the golden syrup and butter until it is a caramel looking colour. If you've made flapjacks before, you'll notice the method is quite similar!


    Once you've melted the butter and golden syrup, mix this into the dry ingredients. Such a simple recipe!


    Divide the mixture into about 28 balls. It's quite messy and you have to get your hands in there but its worth it! Press down slightly with a fork and cook for 12-15 mins depending on how chewy you want them. 12 mins it's more of a chewy cookie, wheras 15 makes a crunchy cookie. Both are amazing!


    And there you have it, oaty goodness straight from the oven! Enjoy!


    Liddie x

    Tuesday 18 February 2014

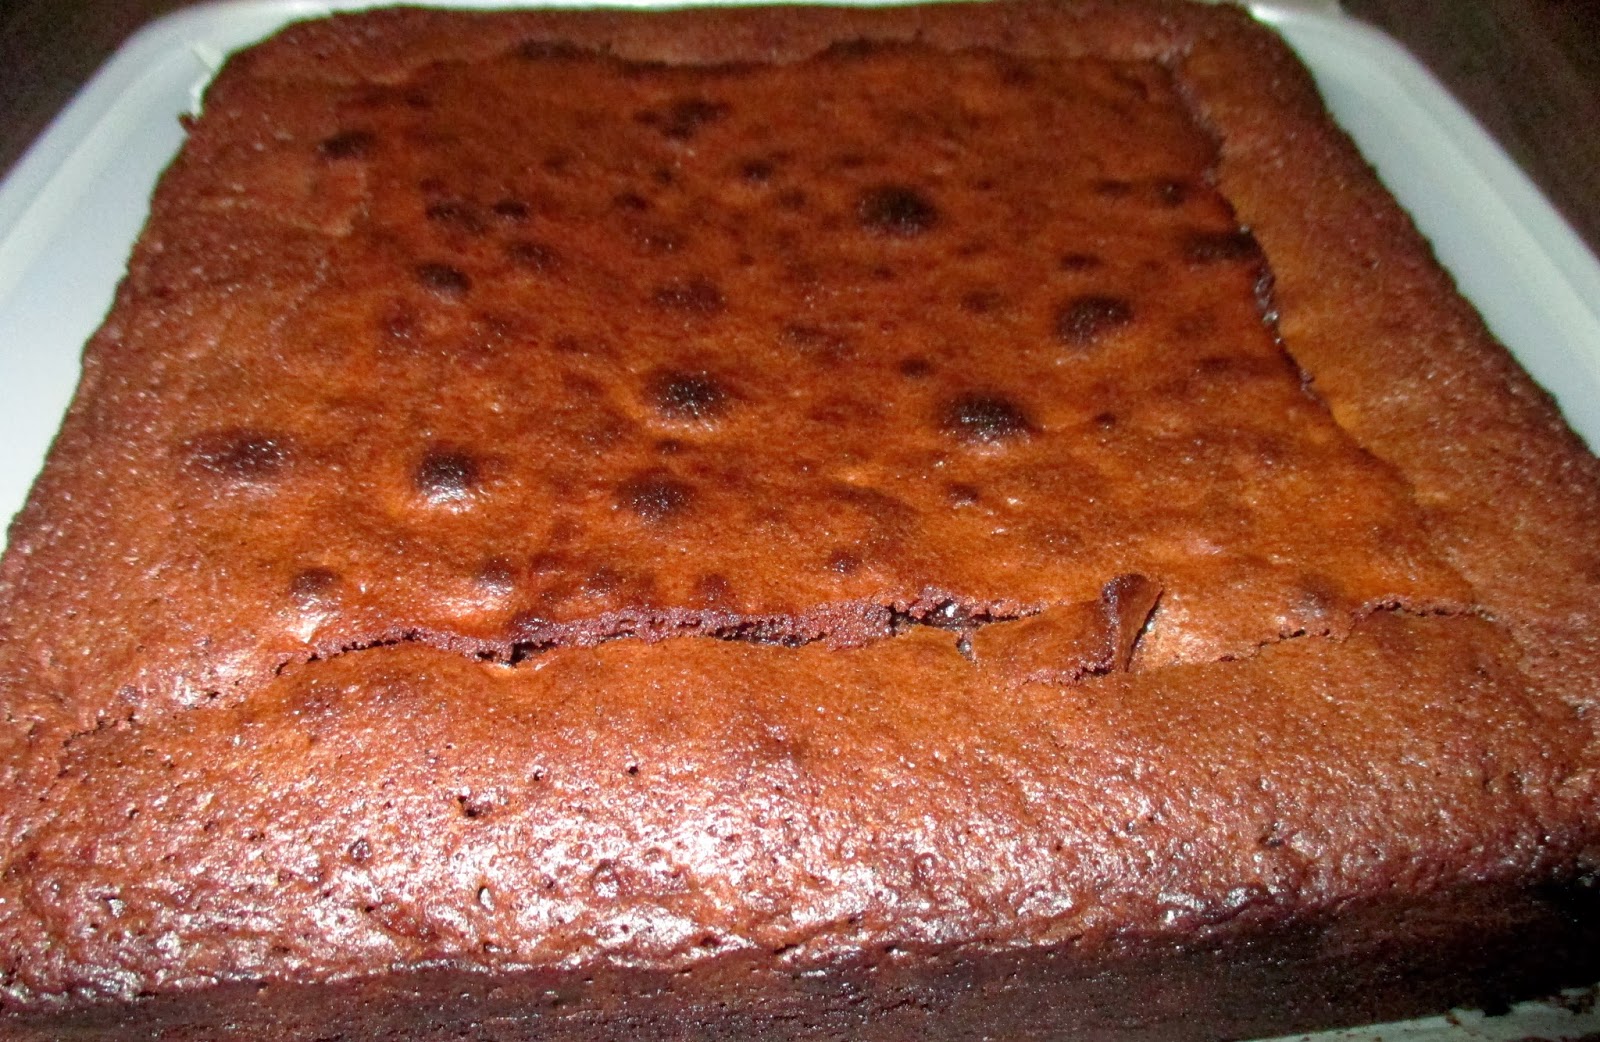
    Chocolate Heaven Brownies

    Brownies were not something I often made, and if I did make them, I never found a recipe to do them justice. After a lot of trial and error, I found the perfect brownie recipe. They come out amazingly every time, gooey in the middle and so rich and chocolatey that they will satisfy anyones sweet tooth. If you're going to try any brownies today, then try these ones!
     
    Recipe
     
  • 185g unsalted butter
  • 185g best dark chocolate
  • 85g plain flour
  • 40g cocoa powder
  • 50g white chocolate
  • 50g milk chocolate
  • 3 large eggs
  • 275g golden caster sugar
  •  
     
    First, preheat the oven to 170-180°C. Melt together the butter and the dark chocolate. You can do this either in a pan, over a bowl of boiling water, or in the microwave. If you do it in the microwave make sure to keep an eye on it.


    Then, add the eggs and whisk together. You have to whisk for quite a while (6 or so minutes) in order to incorporate air into the mixture.


    It should look nice and frothy when mixed. Add the melted chocolate and slowly fold it in to the sugar/egg mixture.


    Sieve the flour and cocoa and pour this into the chocolatey mixture. 


    Mmm chocolatey goodness! You will want to eat it out the bowl at this point but trust me, it' gets even better. Pour it into a lined tin, and you can either chop up the white & milk chocolate into chocolate chips or press it into the mixture like we did below. 


    Bake for about 25 minutes on 170°C, if it wobbles when you shake the tin then give it a few minutes more. Take it out and enjoy the chocolatey, gooey goodness. Let me know if you agree that they are the best brownies in the world!


    Liddie xx

    Yummy Shepards Pie

    During my first year of uni, I spent my time living off frozen food and ready meals. I spent that year on an intensive course and never had a lot of time to cook, so used it as an excuse not to. However, since I've been living with my boyfriend I've really started to enjoy cooking, espeically from scratch. Plus it is so much better for you not to have any of that rubbish in your body. Things like Shepards pie are fantastic for freezing or putting in the fridge and re-heating the next day. If you're living by yourself, you could cook this at the weekend and it could be your meal for 4 days of the week - definitely no excuse not to cook!
     
     I'm not pretending to be an amazing chef, but I thought if I could share a few of my favourite recipes then it might help somebody out there!
     
    Recipe
     
    1 pack (about 400g) beef mince.
    1 tin chopped tomatoes.
    1 red onion.
    4 carrots, peeled and chopped.
    1kg potatoes, peeled and chopped.
    85g marg or butter.
    100-200ml milk.
    50g cheese.
    2 beef stock cubes.
    Flavourings/Spices of your choice.
    
     
    Firstly, you need to prepare your potatoes and veg. This takes quite a while (but it is worth it!). Peel and chop your potatoes into even sized pieces, wash them and then put them in the pan ready to go.
     
     
    Peel and chop your carrots, onion and any other veg you might be including.
     
     
    Put a saucepan onto medium heat and let it heat up for a few minutes. Once heated, add your mince.
     
     
    Fry your mince intil browned, then add any veg.
     
     
    While your waiting for the veg to cook, add boiling water to the pan of potatoes on a medium-high heat. (My potatoes took about 25 mins).
     
    Once your veg has softened, add chopped tomatoes and mix it in.
     
     
    Then add the beef stock cubes and mix. Add any spices or flavourings. My staples for a beef mince dish are lea and perrins, black pepper, a pinch of salt, tomato puree and I also added some cayenne pepper for a bit of a kick.
     
     
    Let that simmer away while you sort out the potatoes. Drain them, and then add the butter and milk until its lovely, creamy mash. I usually add the milk by eye until it looks soft enough, so the measurement in the recipe is an estimate.


    Pour the mince into the bottom of a dish and spread out evenly.
     
     
    Then spoon on the mashed potatoes, pressing it down with a fork to make it nice and fluffy looking. Sprinkle on the cheese.
     
     
    Then put it into the oven for about half an hour, until nice and golden. Serve up and enjoy!


    Liddie x
     

    Friday 28 February 2014

    Mini Lemon & Strawberry Cheesecakes


    I went through a stage where I didn't like cheesecake. In school, we often had to make the same thing every week and change different ingredients every time to assess for our coursework. One of those things was cheesecake. I had cheesecake every week for a long time, and eventually got sick of it, and didn't eat it for a few years after that. But now I've learned to love it again - it's quite a summery treat but it reminds me of christmases at home where we always have a cheesecake for dessert. These mini no-bake cheesecakes are great for portion control and they look adorable!
     
    Recipe
     
    125g digestive biscuits
    50g butter
    140ml double cream
    300g cream cheese
    2-3 squeezes of lemon juice
    50g icing sugar
     
    Firstly, crush the digestive biscuits into crumbs. Melt the butter, either in the microwave or on the hob, and add in the crumbly biscuits.


    Line a muffin pan with cupcake cases (I made 9 good sized cheesecakes). Press the biscuit base into the bottom of the cases and flatten out with the back of a teaspoon, so that it's nice and even. Let them set in the fridge for an hour or two.
     
     
    When the base is set, whisk together the cream cheese and icing sugar and then whisk in the cream until it is thick and creamy.


    Lay it onto the chilled bases and smooth it down.


    Let them set for a few hours or overnight and then carefully peel away the cases. And there you have it, cute little cheesecakes! Enjoy!


    Liddie xx

    Thursday 27 February 2014

    Chicken Katsu Curry

     
    Before I made my own chicken katsu for the first time, I had never tried it and so I can't compare this curry to ones you get in Japanese restaurants. However, this curry is really yummy! It is quite similar to ones you get in chip shops or Chinese takeaways, but with a hint of sweetness. The first time I made it I deep fried the chicken according to the recipe, however I have now decided just to bake the chicken in the oven. Although it doesn't go as golden and nice looking as when you fry them, it tastes just as good and is so much healthier! So if you're after a takeaway, make this instead. Healthier and cheaper! (although after some research I've found out that katsu IS the deep fried version, so mine isn't technically katsu chicken. But it it still has the katsu curry sauce).
     
    Recipe  - Serves 4 (Retrieved from allrecipes.co.uk)
     
    2 tablespoons sunflower oil


    2 onions, sliced
    5 garlic cloves, chopped
    2 medium carrots, sliced
    2 tablespoons plain flour
    4 teaspoons curry powder
    600ml chicken stock
    2 teaspoons honey
    4 teaspoons soy sauce
    1 bay leaf
    1 teaspoon garam masala
     
    For the breaded chicken
  • 4 chicken breast fillets, pounded to 1cm thickness
  • Salt and pepper to taste
  • 2 tablespoons plain flour
  • 1 egg, beaten
  • 100g fine breadcrumbs or panko breadcrumbs
  • 230ml vegetable oil for frying
  •  
    First, prepare the carrots, garlic and onion. Then get everything ready for coating the chicken - you will need the egg, breadcrumbs and flour in seperate bowls.


    The chicken breasts need coating first in flour, then in egg and finally covered in breadcrumbs. Make sure you give them a good coating. I baked mine at 180°C for 30 minutes, so put them in whenever you like - the sauce takes about the same time. Or you can fry them if you prefer, this is just the way I did it.
     
    Heat the oil in a saucepan, and then fry the onion and garlic until soft. Then add carrots and cook for 10 minutes.


    Add the flour and curry powder and cook for about a minute, and then gradually add the chicken stock.


    Once you've added the chicken stock, add the honey, bay leaf, soy sauce and garam masala. Bring it to the boil and then let it simmer for about 10-15 mins. We blended the veg into the curry and it tasted lovely, but you can sieve them out if you prefer. Take out the chicken, slice it and enjoy on rice or homemade wedges!


    Liddie x

    Tuesday 25 February 2014

    Oaty Cookies


    I was on the look out for a good oat cookie when I came across these, Mary Berry's oat cookies. I've tried a few of Mary Berry's recipes before and they always turn out great, so I knew I had to try them. I wasn't disapointed, they are so delicious! They remind me a bit of hobnobs, but a lot nicer as they are homemade. You can make them soft, chewy or crunchy depending on how long you cook them for. Perfect with a cup of tea!


    Recipe
     
    175 g self-raising flour
    75 g porridgeoats
    175 g granulated sugar (But I use caster sugar and they  still turn out great)
    1 tsp bicarbonate of soda
    1 tsp baking powder
    175 g butter
    2 tbsp golden syrup 
     
     
    First, pre-heat the oven to 180°C. Mix together all of the dry ingredients.


    Then, in either a saucepan on a medium heat or in the microwave, heat together the golden syrup and butter until it is a caramel looking colour. If you've made flapjacks before, you'll notice the method is quite similar!


    Once you've melted the butter and golden syrup, mix this into the dry ingredients. Such a simple recipe!


    Divide the mixture into about 28 balls. It's quite messy and you have to get your hands in there but its worth it! Press down slightly with a fork and cook for 12-15 mins depending on how chewy you want them. 12 mins it's more of a chewy cookie, wheras 15 makes a crunchy cookie. Both are amazing!


    And there you have it, oaty goodness straight from the oven! Enjoy!


    Liddie x

    Tuesday 18 February 2014

    Chocolate Heaven Brownies

    Brownies were not something I often made, and if I did make them, I never found a recipe to do them justice. After a lot of trial and error, I found the perfect brownie recipe. They come out amazingly every time, gooey in the middle and so rich and chocolatey that they will satisfy anyones sweet tooth. If you're going to try any brownies today, then try these ones!
     
    Recipe
     
  • 185g unsalted butter
  • 185g best dark chocolate
  • 85g plain flour
  • 40g cocoa powder
  • 50g white chocolate
  • 50g milk chocolate
  • 3 large eggs
  • 275g golden caster sugar
  •  
     
    First, preheat the oven to 170-180°C. Melt together the butter and the dark chocolate. You can do this either in a pan, over a bowl of boiling water, or in the microwave. If you do it in the microwave make sure to keep an eye on it.


    Then, add the eggs and whisk together. You have to whisk for quite a while (6 or so minutes) in order to incorporate air into the mixture.


    It should look nice and frothy when mixed. Add the melted chocolate and slowly fold it in to the sugar/egg mixture.


    Sieve the flour and cocoa and pour this into the chocolatey mixture. 


    Mmm chocolatey goodness! You will want to eat it out the bowl at this point but trust me, it' gets even better. Pour it into a lined tin, and you can either chop up the white & milk chocolate into chocolate chips or press it into the mixture like we did below. 


    Bake for about 25 minutes on 170°C, if it wobbles when you shake the tin then give it a few minutes more. Take it out and enjoy the chocolatey, gooey goodness. Let me know if you agree that they are the best brownies in the world!


    Liddie xx

    Yummy Shepards Pie

    During my first year of uni, I spent my time living off frozen food and ready meals. I spent that year on an intensive course and never had a lot of time to cook, so used it as an excuse not to. However, since I've been living with my boyfriend I've really started to enjoy cooking, espeically from scratch. Plus it is so much better for you not to have any of that rubbish in your body. Things like Shepards pie are fantastic for freezing or putting in the fridge and re-heating the next day. If you're living by yourself, you could cook this at the weekend and it could be your meal for 4 days of the week - definitely no excuse not to cook!
     
     I'm not pretending to be an amazing chef, but I thought if I could share a few of my favourite recipes then it might help somebody out there!
     
    Recipe
     
    1 pack (about 400g) beef mince.
    1 tin chopped tomatoes.
    1 red onion.
    4 carrots, peeled and chopped.
    1kg potatoes, peeled and chopped.
    85g marg or butter.
    100-200ml milk.
    50g cheese.
    2 beef stock cubes.
    Flavourings/Spices of your choice.
    
     
    Firstly, you need to prepare your potatoes and veg. This takes quite a while (but it is worth it!). Peel and chop your potatoes into even sized pieces, wash them and then put them in the pan ready to go.
     
     
    Peel and chop your carrots, onion and any other veg you might be including.
     
     
    Put a saucepan onto medium heat and let it heat up for a few minutes. Once heated, add your mince.
     
     
    Fry your mince intil browned, then add any veg.
     
     
    While your waiting for the veg to cook, add boiling water to the pan of potatoes on a medium-high heat. (My potatoes took about 25 mins).
     
    Once your veg has softened, add chopped tomatoes and mix it in.
     
     
    Then add the beef stock cubes and mix. Add any spices or flavourings. My staples for a beef mince dish are lea and perrins, black pepper, a pinch of salt, tomato puree and I also added some cayenne pepper for a bit of a kick.
     
     
    Let that simmer away while you sort out the potatoes. Drain them, and then add the butter and milk until its lovely, creamy mash. I usually add the milk by eye until it looks soft enough, so the measurement in the recipe is an estimate.


    Pour the mince into the bottom of a dish and spread out evenly.
     
     
    Then spoon on the mashed potatoes, pressing it down with a fork to make it nice and fluffy looking. Sprinkle on the cheese.
     
     
    Then put it into the oven for about half an hour, until nice and golden. Serve up and enjoy!


    Liddie x


    Bakes by Liddie Template by Ipietoon Cute Blog Design