Tuesday, 25 February 2014

Oaty Cookies


I was on the look out for a good oat cookie when I came across these, Mary Berry's oat cookies. I've tried a few of Mary Berry's recipes before and they always turn out great, so I knew I had to try them. I wasn't disapointed, they are so delicious! They remind me a bit of hobnobs, but a lot nicer as they are homemade. You can make them soft, chewy or crunchy depending on how long you cook them for. Perfect with a cup of tea!


Recipe
 
175 g self-raising flour
75 g porridgeoats
175 g granulated sugar (But I use caster sugar and they  still turn out great)
1 tsp bicarbonate of soda
1 tsp baking powder
175 g butter
2 tbsp golden syrup 
 
 
First, pre-heat the oven to 180°C. Mix together all of the dry ingredients.


Then, in either a saucepan on a medium heat or in the microwave, heat together the golden syrup and butter until it is a caramel looking colour. If you've made flapjacks before, you'll notice the method is quite similar!


Once you've melted the butter and golden syrup, mix this into the dry ingredients. Such a simple recipe!


Divide the mixture into about 28 balls. It's quite messy and you have to get your hands in there but its worth it! Press down slightly with a fork and cook for 12-15 mins depending on how chewy you want them. 12 mins it's more of a chewy cookie, wheras 15 makes a crunchy cookie. Both are amazing!


And there you have it, oaty goodness straight from the oven! Enjoy!


Liddie x

Tuesday, 18 February 2014

Chocolate Heaven Brownies

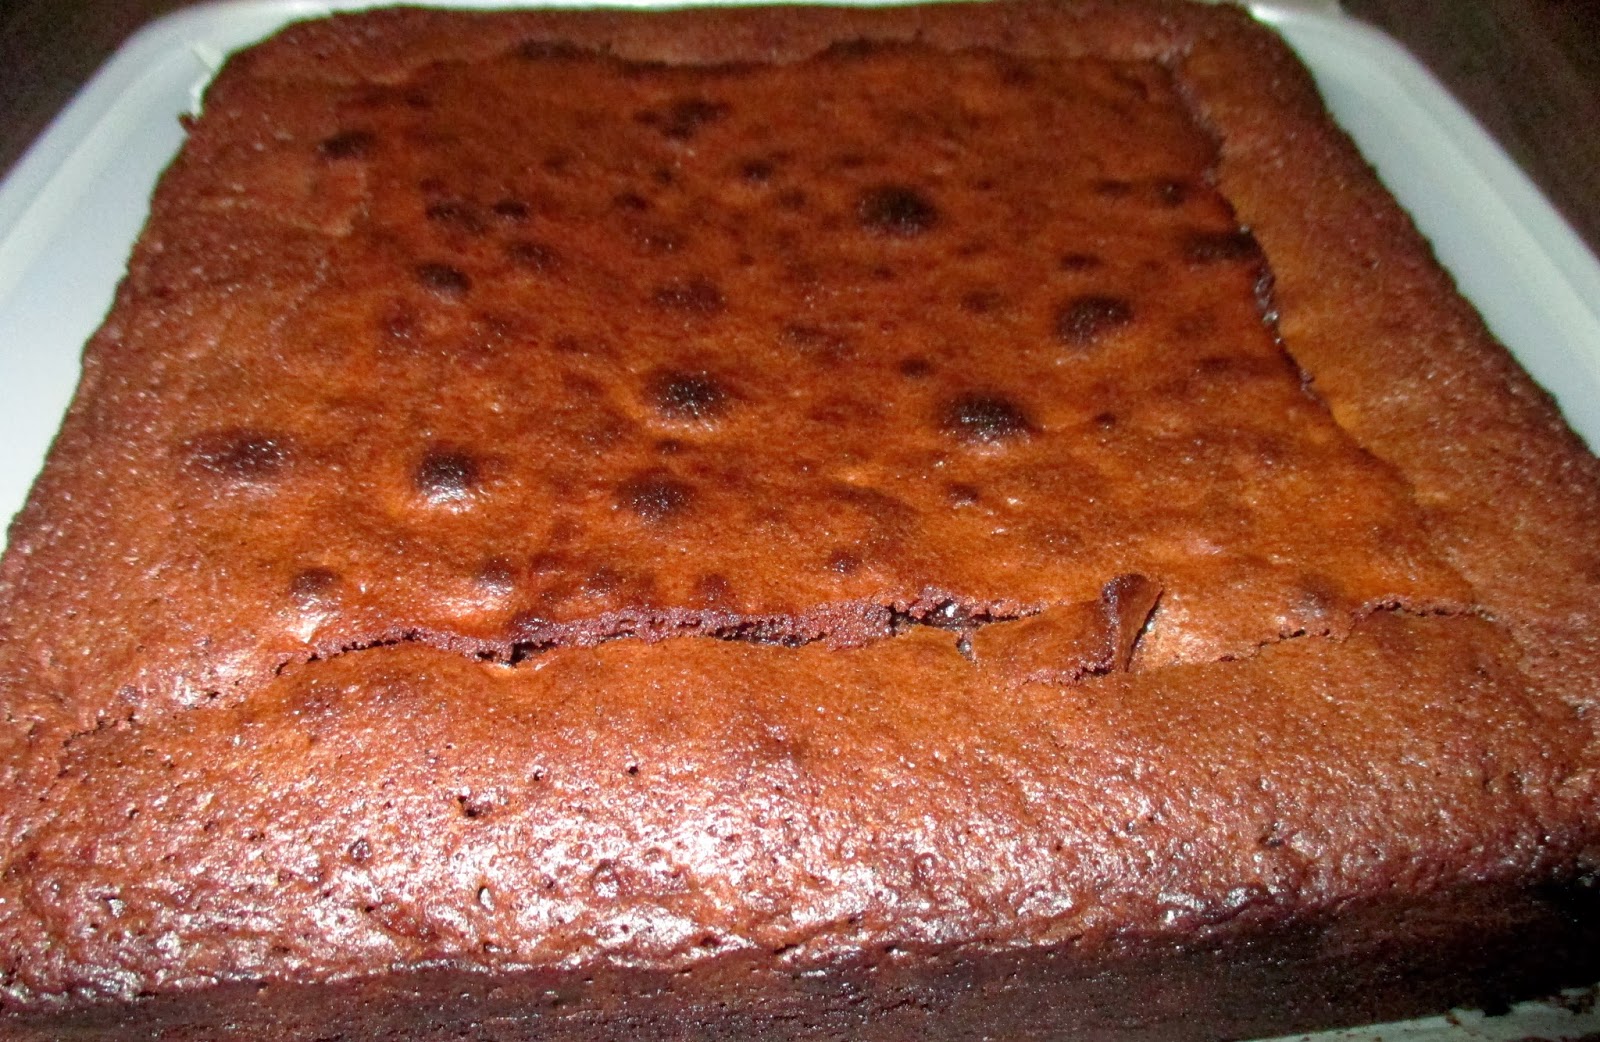
Brownies were not something I often made, and if I did make them, I never found a recipe to do them justice. After a lot of trial and error, I found the perfect brownie recipe. They come out amazingly every time, gooey in the middle and so rich and chocolatey that they will satisfy anyones sweet tooth. If you're going to try any brownies today, then try these ones!
 
Recipe
 
  • 185g unsalted butter
  • 185g best dark chocolate
  • 85g plain flour
  • 40g cocoa powder
  • 50g white chocolate
  • 50g milk chocolate
  • 3 large eggs
  • 275g golden caster sugar
  •  
     
    First, preheat the oven to 170-180°C. Melt together the butter and the dark chocolate. You can do this either in a pan, over a bowl of boiling water, or in the microwave. If you do it in the microwave make sure to keep an eye on it.


    Then, add the eggs and whisk together. You have to whisk for quite a while (6 or so minutes) in order to incorporate air into the mixture.


    It should look nice and frothy when mixed. Add the melted chocolate and slowly fold it in to the sugar/egg mixture.


    Sieve the flour and cocoa and pour this into the chocolatey mixture. 


    Mmm chocolatey goodness! You will want to eat it out the bowl at this point but trust me, it' gets even better. Pour it into a lined tin, and you can either chop up the white & milk chocolate into chocolate chips or press it into the mixture like we did below. 


    Bake for about 25 minutes on 170°C, if it wobbles when you shake the tin then give it a few minutes more. Take it out and enjoy the chocolatey, gooey goodness. Let me know if you agree that they are the best brownies in the world!


    Liddie xx

    Yummy Shepards Pie

    During my first year of uni, I spent my time living off frozen food and ready meals. I spent that year on an intensive course and never had a lot of time to cook, so used it as an excuse not to. However, since I've been living with my boyfriend I've really started to enjoy cooking, espeically from scratch. Plus it is so much better for you not to have any of that rubbish in your body. Things like Shepards pie are fantastic for freezing or putting in the fridge and re-heating the next day. If you're living by yourself, you could cook this at the weekend and it could be your meal for 4 days of the week - definitely no excuse not to cook!
     
     I'm not pretending to be an amazing chef, but I thought if I could share a few of my favourite recipes then it might help somebody out there!
     
    Recipe
     
    1 pack (about 400g) beef mince.
    1 tin chopped tomatoes.
    1 red onion.
    4 carrots, peeled and chopped.
    1kg potatoes, peeled and chopped.
    85g marg or butter.
    100-200ml milk.
    50g cheese.
    2 beef stock cubes.
    Flavourings/Spices of your choice.
    
     
    Firstly, you need to prepare your potatoes and veg. This takes quite a while (but it is worth it!). Peel and chop your potatoes into even sized pieces, wash them and then put them in the pan ready to go.
     
     
    Peel and chop your carrots, onion and any other veg you might be including.
     
     
    Put a saucepan onto medium heat and let it heat up for a few minutes. Once heated, add your mince.
     
     
    Fry your mince intil browned, then add any veg.
     
     
    While your waiting for the veg to cook, add boiling water to the pan of potatoes on a medium-high heat. (My potatoes took about 25 mins).
     
    Once your veg has softened, add chopped tomatoes and mix it in.
     
     
    Then add the beef stock cubes and mix. Add any spices or flavourings. My staples for a beef mince dish are lea and perrins, black pepper, a pinch of salt, tomato puree and I also added some cayenne pepper for a bit of a kick.
     
     
    Let that simmer away while you sort out the potatoes. Drain them, and then add the butter and milk until its lovely, creamy mash. I usually add the milk by eye until it looks soft enough, so the measurement in the recipe is an estimate.


    Pour the mince into the bottom of a dish and spread out evenly.
     
     
    Then spoon on the mashed potatoes, pressing it down with a fork to make it nice and fluffy looking. Sprinkle on the cheese.
     
     
    Then put it into the oven for about half an hour, until nice and golden. Serve up and enjoy!


    Liddie x
     

    Sunday, 16 February 2014

    Alfa Romeo Birthday Cake

     It was my brothers 30th birthday last week, and I was invited to his celebrations. This consisted of a bar crawl which started at 2pm.. I'm quite surprised I stayed alive to be honest! But I did and it was a lot of fun. Anyway, the reason I'm making a blog post about it is because it's the first time since I've been at uni that I've been home for someones birthday. And the first thing that entered my mind? Birthday cake!
    Me and my boyfriend can't eat full cakes to ourselves (well, we probably could, but shouldn't:P) so I decided it was the perfect opportunity to try out my cake decorating skills. I've only made a couple of big cakes in the past, so I made myself a big task of doing a carved cake for the first time. This would be in the shape of an alfa romeo - my brothers favourite car. It was quite a big mission, but I was excited to try it!
     
     Firstly, I watched quite a few youtube videos on how to make a car cake. I printed off pictures of the car so that it would fit on an A4 page - making sure to get an image of the front and the back as well as the whole car. I made the tires a week in advance, out of fondant icing.


    I made two Madeira cakes in the shape of big loaves. I used the cake tin I mentioned in my previous post, where you can adjust the size of the tin. So I managed to fit both these massive cakes in one cake tin. This was also my first time making a Madeira cake, and I was impressed. I wish I had known of this cake when I made a giant cupcake - it has a great crust on the outside that's perfect for carving.


    Before I forget to mention, I froze the cakes in foil before I carved them, just to make it a bit less crumbly. I then split both of the cakes in half, filled them with buttercream and stacked them. I cut out the image of the car and slowly cut the cake around it.
     
    It does look easier than it is! Especially the shaping of the front - I did choose quite an awkward car that was very difficult to carve!


    Here the cake is all carved and covered in buttercream. As you can see, it's in the shape of a car now, yay! The mistake I made here is I did a crumb coat, but the second coat of buttercream is far too thick. It covered up a lot of the carving we had done on the front of the car. I let the icing set for an hour or so, and then covered it in red fondant icing. I then added all the details onto the car. It took ages, but was worth it - it's definitely the best cake I've made to date!
     
    Top tip - To give a shine to fondant, mix together equal parts of golden syrup to vodka and brush onto icing. It gives such a nice shine to cakes and I will be using it a lot in the future (and no, you can't taste it once it's dry:P).
     
    The cake turned out better than I ever imagined, and I'm so happy I gave it a go. Now I can say I've attempted a carved cake - and succeeded!


    Liddie x

    Saturday, 15 February 2014

    Simple Bread Loaf

    I have had the most successful baking day today! I've never made a proper loaf of bread before, and decided it was about time I tried one. I've made iced buns and bread rolls once before, both of which turned out well and I just love the satisfaction of making your own bread. I love watching it rise while you proof it - it's not like anything else you can bake! Seeing as me and my boyfriend were having an unproductive day and not doing much, and seeing as I'd need a packed lunch to take with me to my volunteer job on Monday, I decided it was about time I made one!
     

    Recipe

  • 500g strong white flour, plus extra for dusting
  • 1 tsp salt
  • 7g sachet fast-action yeast
  • 3 tbsp olive oil
  • 300ml water


  •  
    I adjusted it to 1 tsp salt from 2 as I thought 2 was a bet excessive. I also used cold water - although some people say warm water helps with the activation of the yeast. But my loaf turned out great with cold water, so I suppose its personal preference!
     
    Firstly, mix together the flour, salt and yeast. Make a well in the middle and add the oil and the water until it comes together into a dough.


    It should look something like this. A bit weird looking, but stick with it, once it has been kneaded it will all come together! I mixed it for about 10 mins in my stand mixer, because I'm lazy. But you can knead it by hand if you don't have one. Once it has been kneaded, it will become all soft and pillowy.
     
     
    Once you've kneaded it enough, put it in a bowl lightly greased with oil. Cover it with clingfilm. You can either leave it in the fridge overnight, or leave it to prove for an hour or two on a counter top. I left mine to prove for a couple of hours, as I felt an hour wasn't quite enough.
     
     
    It's about doubled in size now, as you can see! Now, take it out the bowl and give it a bit of a punch and mould it into a long, thick shape to fit into a loaf tin. I don't have a loaf tin, so I used this fancy cake tin my brother got me for Christmas. You can adjust it so that you can make different square/rectangle shapes. It's such a good idea!
     
     
    Here's what mine looked like, and a sneak peak at my fancy tin :D Leave it to prove again. I left mine for about 3-4 hours. I was going to put it in the oven after a couple of hours, but then got distracted with making dinner and whilst I was doing that it grew even more!
     
     
    Yay! All nice and proved! I brushed some egg on the top, sprinkled it with flour and then to make it look all fancy, I slit it diagonally a few times across the top. That's completely optional though. I then cooked it on  200°C for half an hour. It should sound hollow on the bottom.
     
     
    And there you have it, a perfect loaf of bread! I didn't believe it was that easy, either. It turned out so soft and lovely, just like from a bakery. Give it a try and you won't be disappointed!


    Liddie x

    Tuesday, 11 February 2014

    Neapolitan Cupcakes

    I've wanted to do Neapolitan cupcakes for ages. They're such a good idea, you get a bit of vanilla, strawberry and chocolate cupcake all at once! Plus, they look brilliant.
     
    Firstly, I started off with my basic sponge recipe. I split the mixture into three bowls. In one I added about 5-10g of cocoa powder, one I added a bit of vanilla essence and in the third I flavoured it with a bit of strawberry jam and coloured it pink. (I was a bit enthusiastic here with the colouring, and it went a bit darker than I would have liked!)
     
     
    I then spooned the mixture into the cupcake cases, one flavour at a time. As you can see I mixed this up a  bit, some have chocolate at the bottom, some on the top, etc.
    I then put them in the oven at 170°C for about 25 minutes, although your oven may vary.
     
    When they came out, I made a basic buttercream (200g icing sugar to 100g butter) and split it up the same as I did with the cake mixture. I iced them with a 2d nozzle. Unfortunately, I didn't make enough buttercream to ice the cupcakes as much as I would have liked, so next time I'd probably do a 300g icing sugar mix. However my icing sugar ran out so I didn't really have the option to do more :P Because they weren't as swirly as I would have liked, I put these cute little flags I've had for ages on top to make them look a bit more pretty. And voila - Neapolitan cupcakes!


    Liddie x

    Tuesday, 25 February 2014

    Oaty Cookies


    I was on the look out for a good oat cookie when I came across these, Mary Berry's oat cookies. I've tried a few of Mary Berry's recipes before and they always turn out great, so I knew I had to try them. I wasn't disapointed, they are so delicious! They remind me a bit of hobnobs, but a lot nicer as they are homemade. You can make them soft, chewy or crunchy depending on how long you cook them for. Perfect with a cup of tea!


    Recipe
     
    175 g self-raising flour
    75 g porridgeoats
    175 g granulated sugar (But I use caster sugar and they  still turn out great)
    1 tsp bicarbonate of soda
    1 tsp baking powder
    175 g butter
    2 tbsp golden syrup 
     
     
    First, pre-heat the oven to 180°C. Mix together all of the dry ingredients.


    Then, in either a saucepan on a medium heat or in the microwave, heat together the golden syrup and butter until it is a caramel looking colour. If you've made flapjacks before, you'll notice the method is quite similar!


    Once you've melted the butter and golden syrup, mix this into the dry ingredients. Such a simple recipe!


    Divide the mixture into about 28 balls. It's quite messy and you have to get your hands in there but its worth it! Press down slightly with a fork and cook for 12-15 mins depending on how chewy you want them. 12 mins it's more of a chewy cookie, wheras 15 makes a crunchy cookie. Both are amazing!


    And there you have it, oaty goodness straight from the oven! Enjoy!


    Liddie x

    Tuesday, 18 February 2014

    Chocolate Heaven Brownies

    Brownies were not something I often made, and if I did make them, I never found a recipe to do them justice. After a lot of trial and error, I found the perfect brownie recipe. They come out amazingly every time, gooey in the middle and so rich and chocolatey that they will satisfy anyones sweet tooth. If you're going to try any brownies today, then try these ones!
     
    Recipe
     
  • 185g unsalted butter
  • 185g best dark chocolate
  • 85g plain flour
  • 40g cocoa powder
  • 50g white chocolate
  • 50g milk chocolate
  • 3 large eggs
  • 275g golden caster sugar
  •  
     
    First, preheat the oven to 170-180°C. Melt together the butter and the dark chocolate. You can do this either in a pan, over a bowl of boiling water, or in the microwave. If you do it in the microwave make sure to keep an eye on it.


    Then, add the eggs and whisk together. You have to whisk for quite a while (6 or so minutes) in order to incorporate air into the mixture.


    It should look nice and frothy when mixed. Add the melted chocolate and slowly fold it in to the sugar/egg mixture.


    Sieve the flour and cocoa and pour this into the chocolatey mixture. 


    Mmm chocolatey goodness! You will want to eat it out the bowl at this point but trust me, it' gets even better. Pour it into a lined tin, and you can either chop up the white & milk chocolate into chocolate chips or press it into the mixture like we did below. 


    Bake for about 25 minutes on 170°C, if it wobbles when you shake the tin then give it a few minutes more. Take it out and enjoy the chocolatey, gooey goodness. Let me know if you agree that they are the best brownies in the world!


    Liddie xx

    Yummy Shepards Pie

    During my first year of uni, I spent my time living off frozen food and ready meals. I spent that year on an intensive course and never had a lot of time to cook, so used it as an excuse not to. However, since I've been living with my boyfriend I've really started to enjoy cooking, espeically from scratch. Plus it is so much better for you not to have any of that rubbish in your body. Things like Shepards pie are fantastic for freezing or putting in the fridge and re-heating the next day. If you're living by yourself, you could cook this at the weekend and it could be your meal for 4 days of the week - definitely no excuse not to cook!
     
     I'm not pretending to be an amazing chef, but I thought if I could share a few of my favourite recipes then it might help somebody out there!
     
    Recipe
     
    1 pack (about 400g) beef mince.
    1 tin chopped tomatoes.
    1 red onion.
    4 carrots, peeled and chopped.
    1kg potatoes, peeled and chopped.
    85g marg or butter.
    100-200ml milk.
    50g cheese.
    2 beef stock cubes.
    Flavourings/Spices of your choice.
    
     
    Firstly, you need to prepare your potatoes and veg. This takes quite a while (but it is worth it!). Peel and chop your potatoes into even sized pieces, wash them and then put them in the pan ready to go.
     
     
    Peel and chop your carrots, onion and any other veg you might be including.
     
     
    Put a saucepan onto medium heat and let it heat up for a few minutes. Once heated, add your mince.
     
     
    Fry your mince intil browned, then add any veg.
     
     
    While your waiting for the veg to cook, add boiling water to the pan of potatoes on a medium-high heat. (My potatoes took about 25 mins).
     
    Once your veg has softened, add chopped tomatoes and mix it in.
     
     
    Then add the beef stock cubes and mix. Add any spices or flavourings. My staples for a beef mince dish are lea and perrins, black pepper, a pinch of salt, tomato puree and I also added some cayenne pepper for a bit of a kick.
     
     
    Let that simmer away while you sort out the potatoes. Drain them, and then add the butter and milk until its lovely, creamy mash. I usually add the milk by eye until it looks soft enough, so the measurement in the recipe is an estimate.


    Pour the mince into the bottom of a dish and spread out evenly.
     
     
    Then spoon on the mashed potatoes, pressing it down with a fork to make it nice and fluffy looking. Sprinkle on the cheese.
     
     
    Then put it into the oven for about half an hour, until nice and golden. Serve up and enjoy!


    Liddie x
     

    Sunday, 16 February 2014

    Alfa Romeo Birthday Cake

     It was my brothers 30th birthday last week, and I was invited to his celebrations. This consisted of a bar crawl which started at 2pm.. I'm quite surprised I stayed alive to be honest! But I did and it was a lot of fun. Anyway, the reason I'm making a blog post about it is because it's the first time since I've been at uni that I've been home for someones birthday. And the first thing that entered my mind? Birthday cake!
    Me and my boyfriend can't eat full cakes to ourselves (well, we probably could, but shouldn't:P) so I decided it was the perfect opportunity to try out my cake decorating skills. I've only made a couple of big cakes in the past, so I made myself a big task of doing a carved cake for the first time. This would be in the shape of an alfa romeo - my brothers favourite car. It was quite a big mission, but I was excited to try it!
     
     Firstly, I watched quite a few youtube videos on how to make a car cake. I printed off pictures of the car so that it would fit on an A4 page - making sure to get an image of the front and the back as well as the whole car. I made the tires a week in advance, out of fondant icing.


    I made two Madeira cakes in the shape of big loaves. I used the cake tin I mentioned in my previous post, where you can adjust the size of the tin. So I managed to fit both these massive cakes in one cake tin. This was also my first time making a Madeira cake, and I was impressed. I wish I had known of this cake when I made a giant cupcake - it has a great crust on the outside that's perfect for carving.


    Before I forget to mention, I froze the cakes in foil before I carved them, just to make it a bit less crumbly. I then split both of the cakes in half, filled them with buttercream and stacked them. I cut out the image of the car and slowly cut the cake around it.
     
    It does look easier than it is! Especially the shaping of the front - I did choose quite an awkward car that was very difficult to carve!


    Here the cake is all carved and covered in buttercream. As you can see, it's in the shape of a car now, yay! The mistake I made here is I did a crumb coat, but the second coat of buttercream is far too thick. It covered up a lot of the carving we had done on the front of the car. I let the icing set for an hour or so, and then covered it in red fondant icing. I then added all the details onto the car. It took ages, but was worth it - it's definitely the best cake I've made to date!
     
    Top tip - To give a shine to fondant, mix together equal parts of golden syrup to vodka and brush onto icing. It gives such a nice shine to cakes and I will be using it a lot in the future (and no, you can't taste it once it's dry:P).
     
    The cake turned out better than I ever imagined, and I'm so happy I gave it a go. Now I can say I've attempted a carved cake - and succeeded!


    Liddie x

    Saturday, 15 February 2014

    Simple Bread Loaf

    I have had the most successful baking day today! I've never made a proper loaf of bread before, and decided it was about time I tried one. I've made iced buns and bread rolls once before, both of which turned out well and I just love the satisfaction of making your own bread. I love watching it rise while you proof it - it's not like anything else you can bake! Seeing as me and my boyfriend were having an unproductive day and not doing much, and seeing as I'd need a packed lunch to take with me to my volunteer job on Monday, I decided it was about time I made one!
     

    Recipe

  • 500g strong white flour, plus extra for dusting
  • 1 tsp salt
  • 7g sachet fast-action yeast
  • 3 tbsp olive oil
  • 300ml water


  •  
    I adjusted it to 1 tsp salt from 2 as I thought 2 was a bet excessive. I also used cold water - although some people say warm water helps with the activation of the yeast. But my loaf turned out great with cold water, so I suppose its personal preference!
     
    Firstly, mix together the flour, salt and yeast. Make a well in the middle and add the oil and the water until it comes together into a dough.


    It should look something like this. A bit weird looking, but stick with it, once it has been kneaded it will all come together! I mixed it for about 10 mins in my stand mixer, because I'm lazy. But you can knead it by hand if you don't have one. Once it has been kneaded, it will become all soft and pillowy.
     
     
    Once you've kneaded it enough, put it in a bowl lightly greased with oil. Cover it with clingfilm. You can either leave it in the fridge overnight, or leave it to prove for an hour or two on a counter top. I left mine to prove for a couple of hours, as I felt an hour wasn't quite enough.
     
     
    It's about doubled in size now, as you can see! Now, take it out the bowl and give it a bit of a punch and mould it into a long, thick shape to fit into a loaf tin. I don't have a loaf tin, so I used this fancy cake tin my brother got me for Christmas. You can adjust it so that you can make different square/rectangle shapes. It's such a good idea!
     
     
    Here's what mine looked like, and a sneak peak at my fancy tin :D Leave it to prove again. I left mine for about 3-4 hours. I was going to put it in the oven after a couple of hours, but then got distracted with making dinner and whilst I was doing that it grew even more!
     
     
    Yay! All nice and proved! I brushed some egg on the top, sprinkled it with flour and then to make it look all fancy, I slit it diagonally a few times across the top. That's completely optional though. I then cooked it on  200°C for half an hour. It should sound hollow on the bottom.
     
     
    And there you have it, a perfect loaf of bread! I didn't believe it was that easy, either. It turned out so soft and lovely, just like from a bakery. Give it a try and you won't be disappointed!


    Liddie x

    Tuesday, 11 February 2014

    Neapolitan Cupcakes

    I've wanted to do Neapolitan cupcakes for ages. They're such a good idea, you get a bit of vanilla, strawberry and chocolate cupcake all at once! Plus, they look brilliant.
     
    Firstly, I started off with my basic sponge recipe. I split the mixture into three bowls. In one I added about 5-10g of cocoa powder, one I added a bit of vanilla essence and in the third I flavoured it with a bit of strawberry jam and coloured it pink. (I was a bit enthusiastic here with the colouring, and it went a bit darker than I would have liked!)
     
     
    I then spooned the mixture into the cupcake cases, one flavour at a time. As you can see I mixed this up a  bit, some have chocolate at the bottom, some on the top, etc.
    I then put them in the oven at 170°C for about 25 minutes, although your oven may vary.
     
    When they came out, I made a basic buttercream (200g icing sugar to 100g butter) and split it up the same as I did with the cake mixture. I iced them with a 2d nozzle. Unfortunately, I didn't make enough buttercream to ice the cupcakes as much as I would have liked, so next time I'd probably do a 300g icing sugar mix. However my icing sugar ran out so I didn't really have the option to do more :P Because they weren't as swirly as I would have liked, I put these cute little flags I've had for ages on top to make them look a bit more pretty. And voila - Neapolitan cupcakes!


    Liddie x
     

    Bakes by Liddie Template by Ipietoon Cute Blog Design